Install Phalcon PHP On Windows 10

A common misconception is that you need a web server like IIS, Apache, or Nginx to get started with PHP7 development. In fact, PHP7 has its own built in web server that you can invoke at the command prompt. Many modern PHP frameworks support this, such as Phalcon PHP.

Prerequisite:
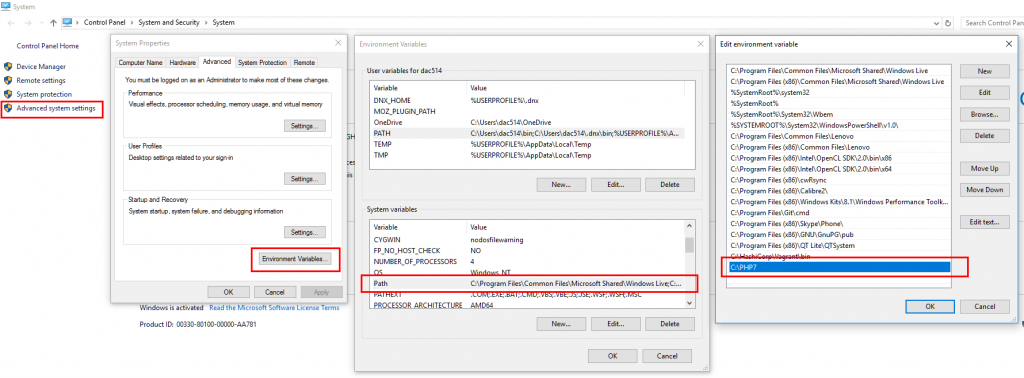
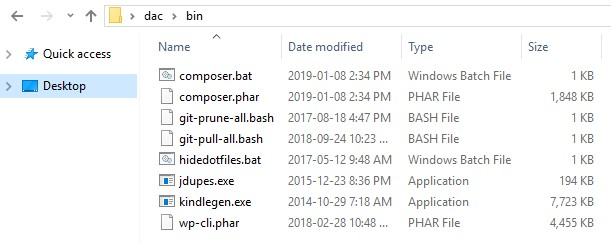
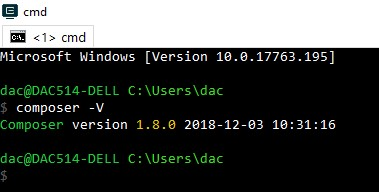
PHP7 and Composer on Windows 10

Installing Phalcon

Download the latest DLL file from GitHub and unzip to C:\PHP7\ext

Make sure the file you download matches your installed PHP version. For me, it was the non-thread safe version, so I picked a file that ended with _nts.zip

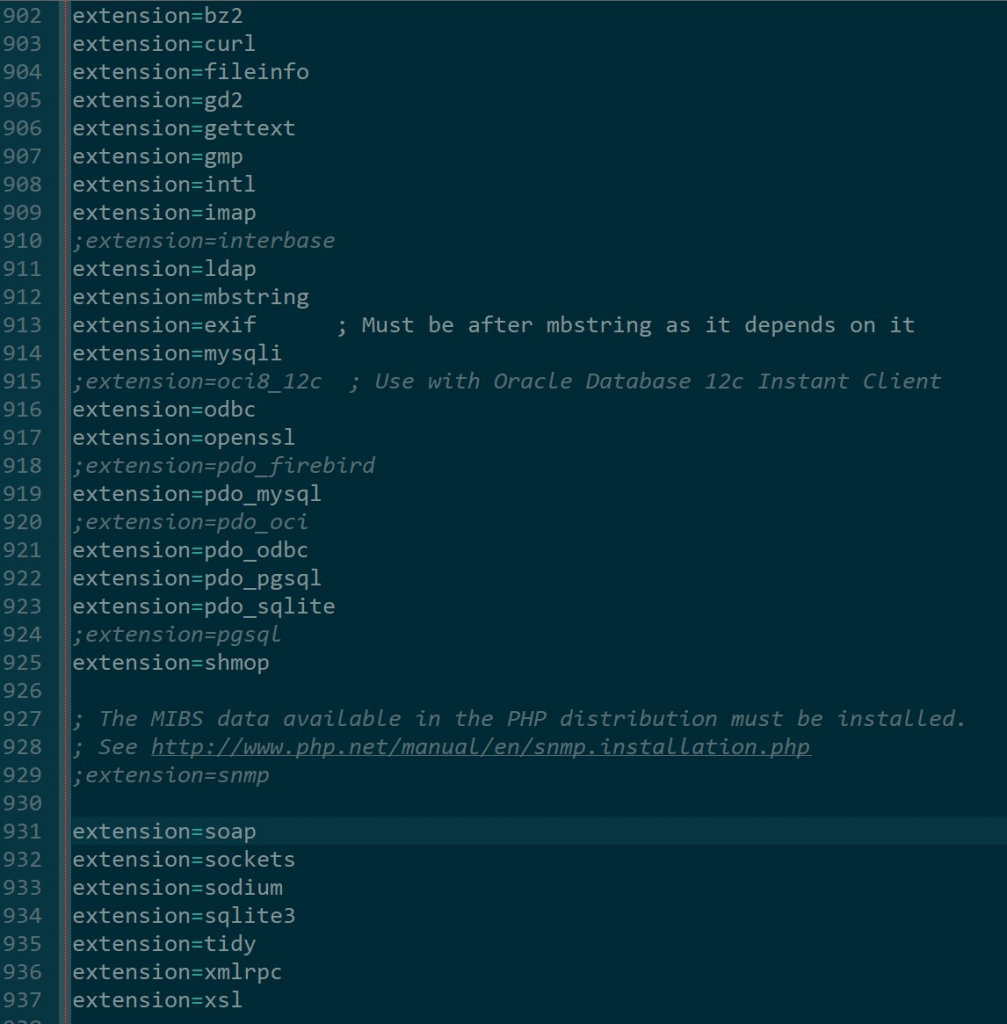
Add extension=php_phalcon.dll to your php.ini file

Drop to the command prompt and do:

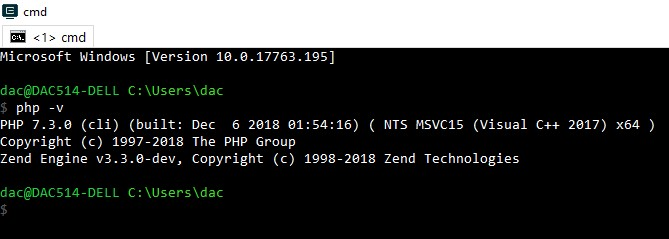
php -v

If you get an error like “PHP Startup: Unable to load dynamic library…” that just means you installed the wrong version:

Whoops, I need x86 not x64.

Don’t panic, download another version, overwrite the DLL, and try again:

No news is good news.

(Source)

Installing Phalcon Dev Tools

In a new folder create a bare bones composer.json file with only this in it:

{
    "require-dev": {
        "phalcon/devtools": "~3.2"
    }
}

At the command prompt, cd to your folder, and do:

composer install

Create a simple project named my_project:

vendor\bin\phalcon.php.bat project my_project simple . 

Launch the built in web server:

cd my_project
..\vendor\bin\phalcon.php.bat serve

(Source)

Switchers Guide To Windows 10 (For Web Developers)

I’m an OS X user from 2003 until 2011 and a Ubuntu user from 2012 until Windows 10.

The freedom to make irrational decisions.

Bash

Here are two (of many) options:

Install Git for Windows. Git for Windows provides a BASH emulator.

Install "Bash On Ubuntu on Windows"

Apt / Homebrew

Checkout Chocolatey or Scoop.

ALT + `

Install EasySwitch. Upvote this feature request in Feedback Hub.

Privacy

Install Shut Up 10. Check out BleachBit.

Minimum Viable Toolset

Start Menu Shortcuts go in:

C:ProgramDataMicrosoftWindowsStart MenuPrograms*

Where is the `/etc/hosts` file?

c:WINDOWSsystem32driversetchosts

Configure Notepad++ as Git editor

git config --global core.editor "'C:/Program Files (x86)/Notepad++/notepad++.exe' -multiInst -notabbar -nosession -noPlugin"

(source)

Are you a switcher too? Share your tips in the key party comments below.

Your Password Hashing Algorithm Is Bad And You Should Feel Bad

No

$pw = md5('password');
$pw = md5('salt' . 'password');
$pw = md5('complicated_salt' . 'password');
$pw = md5('complicated_salt' . strrev('password')); // Don't be clever.

Where md5() = sha1(), base64_encode(), etc.

This type of password hashing is still widespread and susceptible to rainbow table attacks.

Yes

$pw = password_hash('password', PASSWORD_DEFAULT);

(Source)

Uses bcrypt, this particular implementation auto-magically hardens itself over time.

How to use

You are responsible for new \Pdo(), $condition, maybe asking the user to make their 'password' not suck. Read the snippet and reason about it. Don’t just copy/paste, it won’t work.


// Save user password into database

$pw = password_hash($_REQUEST['pw'], PASSWORD_DEFAULT);
$stmt = $pdo->prepare('UPDATE users SET password=? WHERE condition=?');
$stmt->execute([$pw, $condition]);

// Verify user login

$stmt = $pdo->prepare('SELECT password FROM users WHERE condition=?'); 
$stmt->execute([$condition]); 
$row = $stmt->fetch();

if (password_verify($_REQUEST['pw'], $row['password'])) {
  // Check if PHP has improved password security for us
  if (password_needs_rehash($row['password'], PASSWORD_DEFAULT)) {
    // Fix password for next time
    $pw = password_hash($_REQUEST['pw'], PASSWORD_DEFAULT);
    $stmt = $pdo->prepare('UPDATE users SET password=? WHERE condition=?');
    $stmt->execute([$pw, $condition]);
  }
  // Log in
} else {
  // Invalid password
}

Keep on shaking that salt shaker.

WordPress REST API Quickstart

The WordPress REST API has been available since 4.7.  It’s robust, consistent, and nifty to work with. Why? Backend and mobile developers can use other frameworks while still keeping WordPress around for their customers. Frontend developers can build sites using JavaScript without having to touch PHP. Up is down, left is right, dogs and cats living together… Let’s get started!

Recommended Tools

Troubleshooting

  • JSON Formatter: CTRL/CMD+Click a triangle to collapse/expand nodes at the same level.
  • YARC: When testing with Basic Authentication, make sure you are logged out of WordPress first.

Getting Started

WP API supports all HTTP Methods: GET, POST, PUT, PATCH, DELETE, OPTIONS.

WP API respects permissions but the developer must setup authentication separately.

Schema

WP API is self-documenting. Send an OPTIONS request to any endpoint and get back JSON Schema compatible info on how to use it:

OPTIONS

To get the entire API schema in a single query, add context=help at the index. (Ie. http://site/wp-json?context=help )

Features

WP API items have a _links node based on HAL (Hypertext Application Language):

_links

To reduce the number of HTTP requests use the _embed parameter to tell the API that the response should include embeddable resources.

_embed

WP API exposes pagination info in the response header.

Pagination

PHP to JSON

WP API renders JSON in a generic way that does not match the DB columns. Keep calm and RTFM:

if ( ! empty( $schema['properties']['author'] ) ) {
$data['author'] = (int) $post->post_author;
}
if ( ! empty( $schema['properties']['slug'] ) ) {
$data['slug'] = $post->post_name;
}
if ( ! empty( $schema['properties']['content'] ) ) {
$data['content'] = array(
'rendered'  => post_password_required( $post ) ? '' : apply_filters( 'the_content', $post->post_content ),
'protected' => (bool) $post->post_password,
);
}

{
"author": 1,
"slug": "chapter-1",
"content": {
"rendered": "<p>Hello World!</p>",
"protected": false
}
}

Example

Setup the Basic Authentication Plugin on your development environment.

In YARC, add your credentials:

YARC CredentialsSend an OPTIONS request to a post endpoint. The response will contain, among other information:

{
"methods": [
"POST",
"PUT",
"PATCH"
],
"title": {
"required": false,
"description": "The title for the object.",
"type": "object"
},

Translation: The API client can send a PUT request to change the title.

In YARC, send a PUT request with the following JSON to the endpoint:

{ 
"title": "My changed title!" 
}

Congratulations, you just changed the title. 

…cue the sound of a thousand keyboards furiously hacking.

Write Unit Tests For Your WordPress Plugin Using PhpStorm Code Completion

Git clone the WordPress develop repository somewhere on your hard drive:

git clone git@github.com:WordPress/wordpress-develop.git

Open wordpress-develop/tests/phpunit/includes/phpunit6-compat.php in a text editor.

PHPUnit version 5: Comment out the class_alias() functions in phpunit6-compat.php because these break PhpStorm code completion. (These files aren’t actually used by the testing framework, we only downloaded them so they could be included in the Project Configuration’s Include Path.)

PHPUnit version 6 and up: Do the same thing as PHPUnit 5, the paragraph above, except leave this line uncommented:

class_alias( 'PHPUnitFrameworkTestCase', 'PHPUnit_Framework_TestCase' );

In PhpStorm, go to: Settings -> Languages & Frameworks -> PHP and add wordpress-develop/tests/phpunit/includes to your Include Path.

Use WP-CLI to generate the tests scaffolding.

Write tests that extend WP_UnitTestCase. Look at the code in wordpress-develop/tests/phpunit/tests for examples.

Autocomplete!
Autocomplete!

WordPress as a Development Platform

Many people dislike WordPress code. It’s no secret that for contemporary PHP developers WordPress feels antiquated. The founder of WordPress was even once-upon-a-time vocal about not keeping up to date with the PHP eco-system because reasons.

Times changed. So did PHP. So did WordPress.

To give credit where credit is due, the reasoning behind WordPress’ conservative change management is sound. They don’t want to mess with their insanely huge user base.

WordPress powers 30% of all websites on the internet.

That’s a lot of users. By choosing WordPress as your development platform you get massive traction for free.

But… that code. Ugh!

The good news is that when you develop for WordPress you don’t ever touch WordPress code. Instead you write a Plugin. [1] I put forward that in 2017 nothing is stopping you from writing a good, clean Plugin other than yourself.

Environment

WordPress is PHP 7 compatible. WordPress is also HHVM compatible [2]. Running on either vastly increases performance.

It follows that if your environment is PHP 7 then you get the syntax.

Syntax

WordPress Plugins can have PSR compatible namespaces.

WordPress’ answer to Event Dispatcher (and/or Observer) are the add_action() and add_filter() functions. These functions are compatible with closures.

Meaning you can write code like:

add_action('init', function() use ($v) {
    (new \Acme\Foo\Bar\SomeClass($v))->someMethod();
});

add_action('init', '\Acme\some_function');

add_action('init', ['\Acme\Foo\Bar\SomeOtherClass', 'someStaticMethod']);

add_action('init', [$this, 'someOtherMethod']);

Or *any* standards compliant PHP 7 code you want to write.

With thousands of actions and filters available, pretty much any part of WordPress can be changed.

Tools

PHPStorm supports WordPress Plugin development out-of-the-box.

WP-CLI is a set of command-line tools for managing WordPress installations. It simplifies many developer and deployment related tasks and makes unit testing your plugin possible.

WordPress Plugins have PHP CodeSniffer rules ready to go.

WordPress Plugins can be installed using Composer.

Bedrock and Trellis for the win.

Open

WordPress is licenced under the GPL. This still matters.

Getting Things Done

Is there room for improvement? Of course! Just like PHP, WordPress is always improving with the caveat that just like PHP, WordPress strives to keep backwards compatibly.

Developers rejoice, WordPress is moving forward, kicking and screaming as we drag it into the future.

[1] WordPress also has a REST API if you’re into that kind of thing…
[2] https://core.trac.wordpress.org/ticket/40548

Using MySQL Deadlocks To Avoid Overselling

When developing an e-commerce application, unless you work at United Airlines, you generally want to avoid overselling.

Instead of punching your customers in the face why not use MySQL Deadlocks? (Turns out this is a feature not a bug!)

First attempt, creating deadlocks

MySQL has 4 transaction isolation levels: SERIALIZABLE, REPEATABLE READ, READ UNCOMMITTED, READ COMMITTED.

In the following proof of concept, where we have 50 of the same product in stock, and we run seige to represent concurrent customers buying the same product at the same time, we expect 50 “Success!” messages in our log files.

When we use any of REPEATABLE READ, READ UNCOMMITTED, or READ COMMITTED we oversell. (boo!)

When we use SERIALIZABLE we do not oversell (yay!) but some users get deadlock errors while others do not. (SQLSTATE[40001]: Serialization failure: 1213 Deadlock found when trying to get lock; try restarting transaction)

<?php

error_reporting(E_ALL | E_STRICT); // Development

/*
SQL:
CREATE DATABASE `deadlocktest` COLLATE 'utf8_general_ci';
CREATE TABLE `products` ( `id` int NOT NULL AUTO_INCREMENT PRIMARY KEY, `inventory` int NOT NULL );
INSERT INTO `products` (`id`, `inventory`) VALUES ('123', '50');

USEFUL LINUX COMMANDS:
$ rm log.txt; touch log.txt; chmod 777 log.txt
$ seige http://host/file.php
*/

// ------------------------------------------------------------------
// Config
// ------------------------------------------------------------------

$mysqlIsolation = 'SERIALIZABLE'; // ( SERIALIZABLE, REPEATABLE READ, READ UNCOMMITTED, READ COMMITTED )
$productId = 123;
$logFile = __DIR__ . '/log.txt';

$host = '127.0.0.1';
$db = 'deadlocktest';
$user = 'root';
$pass = '';
$charset = 'utf8';
$opt = [
    PDO::ATTR_ERRMODE => PDO::ERRMODE_EXCEPTION,
    PDO::ATTR_DEFAULT_FETCH_MODE => PDO::FETCH_ASSOC,
    PDO::ATTR_EMULATE_PREPARES => false,
];

// ------------------------------------------------------------------
// Functions
// ------------------------------------------------------------------

/**
 * Simulate time it takes to call the payment gateway and do stuff
 */
function doPaymentGatewayStuff()
{
    usleep(500000); // Wait for 0.5 seconds
}

/**
 * Simulate buying a product from our inventory
 *
 * @param PDO $pdo
 * @param int $productId
 * @return int
 * @throws Exception
 */
function buyProduct(PDO $pdo, int $productId): int
{
    $pdo->beginTransaction();

    $selectStmt = $pdo->prepare('SELECT inventory FROM products WHERE id = :id ');
    $selectStmt->execute(['id' => $productId]);
    $res = $selectStmt->fetch();
    if ($res['inventory'] <= 0) {
        throw new Exception("Oh no! Sorry we're out inventory!");
    }

    $newInventory = $res['inventory'] - 1;
    $updateStmt = $pdo->prepare('UPDATE products SET inventory = :inventory WHERE id = :id ');
    $updateStmt->execute(['inventory' => $newInventory, 'id' => $productId]);

    doPaymentGatewayStuff();

    $pdo->commit();

    return $newInventory;
}

// ------------------------------------------------------------------
// Procedure
// ------------------------------------------------------------------

$uniqueUser = uniqid();
try {
    // Set up DB driver
    $pdo = new PDO("mysql:host={$host};dbname={$db};charset={$charset}", $user, $pass, $opt);
    $pdo->query("SET TRANSACTION ISOLATION LEVEL {$mysqlIsolation} ");

    // Simulate buying a product and decreasing inventory
    $newInventory = buyProduct($pdo, $productId);

    // No exceptions were thrown, we consider this successful
    $successMsg = "{$uniqueUser} - Success! Product {$productId} inventory has been decreased to {$newInventory}" . PHP_EOL;
    file_put_contents($logFile, $successMsg, FILE_APPEND);
    echo "$successMsg";
}
catch (Exception $e) {
    if (isset($pdo) && $pdo->inTransaction()) {
        $pdo->rollBack();
    }
    $errorMsg = "{$uniqueUser} - Error! " . $e->getMessage() . PHP_EOL;
    file_put_contents($logFile, $errorMsg, FILE_APPEND);
    echo "$errorMsg";
}

Second attempt, handling deadlocks

The above code has good intentions but many users get the dreaded deadlock message.

Turns out deadlocks are OK! You just have to handle them somehow.

Here’s a fixed proof of concept:

<?php

// ------------------------------------------------------------------
// Config
// ------------------------------------------------------------------

$mysqlIsolation = 'SERIALIZABLE';
$productId = 123;
$logFile = __DIR__ . '/log.txt';

$host = '127.0.0.1';
$db = 'deadlocktest';
$user = 'root';
$pass = '';
$charset = 'utf8';
$opt = [
    PDO::ATTR_ERRMODE => PDO::ERRMODE_EXCEPTION,
    PDO::ATTR_DEFAULT_FETCH_MODE => PDO::FETCH_ASSOC,
    PDO::ATTR_EMULATE_PREPARES => false,
];

// ------------------------------------------------------------------
// Functions
// ------------------------------------------------------------------

/**
 * Check if $e is of type MySQL deadlock
 *
 * @param PDO $pdo
 * @param mixed $e
 * @return bool
 */
function isDeadlock(PDO $pdo, $e): bool
{
    return (
        $e instanceof PDOException &&
        $pdo->getAttribute(PDO::ATTR_DRIVER_NAME) == 'mysql' &&
        $e->errorInfo[0] == 40001 &&
        $e->errorInfo[1] == 1213
    );
}

/**
 * Simulate time it takes to call the payment gateway and do stuff
 */
function doPaymentGatewayStuff()
{
    usleep(500000); // Wait for 0.5 seconds
}

/**
 * Simulate buying a product from our inventory
 *
 * @param PDO $pdo
 * @param int $productId
 * @return int
 * @throws Exception
 */
function buyProduct(PDO $pdo, int $productId): int
{
    $pdo->beginTransaction();

    $selectStmt = $pdo->prepare('SELECT inventory FROM products WHERE id = :id ');
    $selectStmt->execute(['id' => $productId]);
    $res = $selectStmt->fetch();
    if ($res['inventory'] <= 0) {
        throw new Exception("Oh no! Sorry we're out inventory!");
    }

    $newInventory = $res['inventory'] - 1;
    $updateStmt = $pdo->prepare('UPDATE products SET inventory = :inventory WHERE id = :id ');
    $updateStmt->execute(['inventory' => $newInventory, 'id' => $productId]);

    doPaymentGatewayStuff();

    $pdo->commit();

    return $newInventory;
}

// ------------------------------------------------------------------
// Procedure
// ------------------------------------------------------------------

$uniqueUser = uniqid();
$retry = true;
while ($retry)
{
    try {
        // Set up DB driver
        $pdo = new PDO("mysql:host={$host};dbname={$db};charset={$charset}", $user, $pass, $opt);
        $pdo->query("SET TRANSACTION ISOLATION LEVEL {$mysqlIsolation} ");

        // Simulate buying a product and decreasing inventory
        $newInventory = buyProduct($pdo, $productId);

        // No exceptions were thrown, we consider this successful
        $successMsg = "{$uniqueUser} - Success! Product {$productId} inventory has been decreased to {$newInventory}" . PHP_EOL;
        file_put_contents($logFile, $successMsg, FILE_APPEND);
        echo "$successMsg";
        $retry = false;
    }
    catch (Exception $e) {
        if (isset($pdo) && isDeadlock($pdo, $e)) {
            $retry = true;
        } else {
            $retry = false;
            if (isset($pdo) && $pdo->inTransaction()) {
                $pdo->rollBack();
            }
            $errorMsg = "{$uniqueUser} - Error! " . $e->getMessage() . PHP_EOL;
            file_put_contents($logFile, $errorMsg, FILE_APPEND);
            echo "$errorMsg";
        }
    }
}

Huge gaping caveat: With 15 concurrent users the 15th user would be waiting for a long time. Patches welcome.

PHP Composer for Developers

Ever wanted to make a bugfix to a Composer package? You can!

Get a local git clone of the dependency by requiring it with the –prefer-source option.

composer require kizu514/package --prefer-source

But wait that’s not all! If you have your own GitHub namespace you can set things up so that your own code is always installed from source. For example, In the following composer.json snippet all the packages from kizu514 are installed from source, and everything else is dist.

{
    "config": {
        "preferred-install": {
            "kizu514/*": "source",
            "*": "dist"
        }
    }
}

Ever wanted to use a git branch instead of a specific version? You can!

Use inline aliases. To declare an inline alias you must:

  • Prefix branch names with: dev
  • No wildcards (*), must be unambigous.

For example, if my composer.json file had this in it:

"kizu514/package": "1.*",

Then to use a branch I would simply change it to:

"kizu514/package": "dev-BRANCH_NAME as 1.0.9",

Where BRANCH_NAME is a branch that exists on GitHub and 1.0.9 is unambiguous. If you want to check out a branch instead of a tag then simply do:

"kizu514/package": "dev-BRANCH_NAME",

What about private repos?

Use Private Packagist or add to your repositories configuration:

{
  "type": "vcs",
  "no-api": true,
  "url":  "git@github.com:kizu514/secret-project.git"
}

But wait that’s not all! Oh wait, yes, it is.

Manifest.json

My wife’s Japanese comic about our family is a responsive website.

A cool trick I learned at ConFoo while listening to Christian Heilmann speak was that I could leverage built-in mobile technology by simply adding a manifest.json file to the code.

A manifest turns a responsive website into an installable app. It lets users add it on their mobile phone’s home screen. When they launch the site it gets a splash screen and runs in full screen mode, basically behaving like a native app.

Caveat: For this to work HTTPS is required. Use certbot if you don’t already.

I used Manifest Generator to get started and it was easy. According to the ConFoo talk Bing indexes sites with manifest.json files and prioritizes them as smartphone compatible. A simple SEO win?

Now my family’s manga is an app. Horray for the open web!

Building a Simple API using Opulence PHP

This tutorial will show you how to code a simple JSON API using Opulence PHP. We will install Opulence’s skeleton project using composer, then create a ‘user’ database entity, and finally we will match CRUD (Create, Read, Update, Delete) to POST, GET, PUT, and DELETE.

Prerequisites: PHP7, Composer, MySQL.

Installing

Create an Opulence project with the following command:

composer create-project opulence/project SimpleApi --prefer-dist 

The default Opulence app name is Project. Using apex, rename it to SimpleApi.

cd SimpleApi
php apex app:rename Project SimpleApi

This command will output:

JSON Config

According to the documentation if a client does not request JSON then HTML will be returned. This is “the right way to do it” but for the sake of this API we always want to return JSON. We can do this by adding the following code to config/http/views.php:

if (!isset($_SERVER['CONTENT_TYPE'])) {
    $_SERVER['CONTENT_TYPE'] = 'application/json';
}

We also want to disable the default Session and Csrf middlewares because REST clients do not (always) work with cookies. Open config/http/middleware.php and comment out:

return [
    CheckMaintenanceMode::class,
//    Session::class,
//    CheckCsrfToken::class
];

Database Config

Out of the box PostgreSQL is the default database driver. To use MySQL change line ~5 in src/SimpleApi/Application/Bootstrappers/Databases/SqlBootstrapper.php from PostgreSQL to:

use Opulence\Databases\Adapters\Pdo\MySql\Driver;

Manually create a MySQL database named simpleapi and modify config/environment/.env.app.php accordingly.

Environment::setVar('DB_HOST', 'localhost');
Environment::setVar('DB_USER', 'root');
Environment::setVar('DB_PASSWORD', 'root');
Environment::setVar('DB_NAME', 'simpleapi');
Environment::setVar('DB_PORT', 3306);

Database Entity

Create a user table with the following columns: [ id (primary), email (unique), firstname (string), lastname (string), age (integer, optional) , country (2 character string) ]

CREATE TABLE `user` (
  `id` int NOT NULL AUTO_INCREMENT PRIMARY KEY,
  `email` varchar(255) NOT NULL UNIQUE,
  `firstname` varchar(255) NOT NULL,
  `lastname` varchar(255) NOT NULL,
  `age` int,
  `country` char(2) NOT NULL
);

Using apex, create a matching entity class named User.

php apex make:entity User


Note: These commands create stubs / empty templates. You must finish the code yourself!


Open the newly created src/SimpleApi/User.php and finish the mutator methods so that the properties match the database table. Implement JsonSerializable too.

<?php 
namespace SimpleApi; 

use Opulence\Orm\IEntity; 

class User implements IEntity, \JsonSerializable { 

    /** @var int */ 
    private $id;
 
    /** @var string */ 
    private $email; 

    /** @var string */ 
    private $firstname; 

    /** @var string */ 
    private $lastname; 

    /** @var int|null */ 
    private $age; 

    /** @var string */ 
    private $country; 

    public function getId(): int 
    { 
        return (int)$this->id;
    }

    public function setId($id): self
    {
        $this->id = $id;

        return $this;
    }

    public function getEmail(): string
    {
        return $this->email;
    }

    public function setEmail($email): self
    {
        $this->email = $email;

        return $this;
    }

    public function getFirstname(): string
    {
        return $this->firstname;
    }

    public function setFirstname($firstname): self
    {
        $this->firstname = $firstname;

        return $this;
    }

    public function getLastname(): string
    {
        return $this->lastname;
    }

    public function setLastname($lastname): self
    {
        $this->lastname = $lastname;

        return $this;
    }

    /**
     * @return int|null
     */
    public function getAge()
    {
        return $this->age;
    }

    public function setAge($age): self
    {
        $this->age = $age;

        return $this;
    }

    public function getCountry(): string
    {
        return $this->country;
    }

    public function setCountry($country): self
    {
        $this->country = $country;

        return $this;
    }

    public function jsonSerialize() : array
    {
        return [
            'id' => (int)$this->getId(),
            'email' => $this->getEmail(),
            'firstname' => $this->getFirstname(),
            'lastname' => $this->getLastname(),
            'age' => is_null($this->getAge()) ? null : (int)$this->getAge(),
            'country' => $this->getCountry(),
        ];
    }
}

Open src/SimpleApi/Application/Bootstrappers/Orm/OrmBootstrapper.php and register an ID generator for \SimpleApi\User

private function registerIdGenerators(IIdGeneratorRegistry $idGeneratorRegistry)
{
    // Register your Id generators for classes that will be managed by the unit of work
    $idGeneratorRegistry->registerIdGenerator(
        \SimpleApi\User::class,
        new \Opulence\Orm\Ids\Generators\IntSequenceIdGenerator('user_id_seq')
    );
}

Database Mapper

Using apex, create a SQL data mapper named User. When prompted pick SQL data mapper and use \SimpleApi\User as the entity.

php apex make:datamapper User

This command will output:

Open the newly created src/SimpleApi/Infrastructure/Orm/User.php and finish the stubs.

<?php 

namespace SimpleApi\Infrastructure\Orm; 

use Opulence\Orm\DataMappers\SqlDataMapper; 
use Opulence\Orm\OrmException; 

class User extends SqlDataMapper { 

   /** 
    * Adds an entity to the database 
    *
    * @param \SimpleApi\User $user The entity to add 
    * @throws OrmException Thrown if the entity couldn't be added 
    */ 
    public function add($user) 
    { 
        $statement = $this->writeConnection->prepare(
            'INSERT INTO user (email, firstname, lastname, age, country)
             VALUES (:email, :firstname, :lastname, :age, :country)'
        );
        $statement->bindValues([
            'email' => $user->getEmail(),
            'firstname' => $user->getFirstname(),
            'lastname' => $user->getLastname(),
            'age' => $user->getAge(),
            'country' => $user->getCountry(),
        ]);
        $statement->execute();
    }

    /**
     * Deletes an entity
     *
     * @param \SimpleApi\User $user The entity to delete
     * @throws OrmException Thrown if the entity couldn't be deleted
     */
    public function delete($user)
    {
        $statement = $this->writeConnection->prepare('DELETE FROM user WHERE id = :id');
        $statement->bindValues([
            'id' => [$user->getId(), \PDO::PARAM_INT]
        ]);
        $statement->execute();
    }

    /**
     * Gets all the entities
     *
     * @return \SimpleApi\User[] The list of all the entities
     */
    public function getAll() : array
    {
        $sql = 'SELECT * FROM user';

        return $this->read($sql, [], self::VALUE_TYPE_ARRAY);
    }

    /**
     * Gets the entity with the input Id
     *
     * @param int|string $id The Id of the entity we're searching for
     * @return \SimpleApi\User The entity with the input Id
     * @throws OrmException Thrown if there was no entity with the input Id
     */
    public function getById($id): \SimpleApi\User
    {
        $sql = 'SELECT * FROM user WHERE id = :id';
        $parameters = [
            'id' => [$id, \PDO::PARAM_INT]
        ];

        return $this->read($sql, $parameters, self::VALUE_TYPE_ENTITY, true);
    }

    /**
     * Saves any changes made to an entity
     *
     * @param \SimpleApi\User $user The entity to save
     * @throws OrmException Thrown if the entity couldn't be saved
     */
    public function update($user)
    {
        $statement = $this->writeConnection->prepare(
            'UPDATE user SET email = :email, firstname = :firstname, lastname = :lastname,
             age = :age, country = :country
             WHERE id = :id'
        );
        $statement->bindValues([
            'email' => $user->getEmail(),
            'firstname' => $user->getFirstname(),
            'lastname' => $user->getLastname(),
            'age' => $user->getAge(),
            'country' => $user->getCountry(),
            'id' => [$user->getId(), \PDO::PARAM_INT]
        ]);
        $statement->execute();
    }

    /**
     * Loads an entity from a hash of data
     *
     * @param array $hash The hash of data to load the entity from
     * @return \SimpleApi\User The entity
     */
    protected function loadEntity(array $hash): \SimpleApi\User
    {
        $entity = new \SimpleApi\User();

        $entity->setId($hash['id']);
        $entity->setEmail($hash['email']);
        $entity->setFirstname($hash['firstname']);
        $entity->setLastname($hash['lastname']);
        $entity->setAge($hash['age']);
        $entity->setCountry($hash['country']);

        return $entity;
    }
}

Controller Creation

Using apex, create a Controller named User. When prompted pick REST controller.

php apex make:controller User

This command will output:

Open the newly created src/SimpleApi/Application/Http/Controllers/User.php and finish the stubs. Type-hint any objects your controller needs in the controller’s constructor. Create a generic repository object for \SimpleApi\User.

<?php 

namespace SimpleApi\Application\Http\Controllers; 

use Opulence\Http\HttpException; 
use Opulence\Http\Responses\JsonResponse; 
use Opulence\Http\Responses\Response; 
use Opulence\Orm\OrmException; 
use Opulence\Orm\Repositories\Repository; 
use Opulence\Orm\IUnitOfWork; 
use Opulence\Routing\Controller; 

class User extends Controller { 

    /** @var \Opulence\Orm\UnitOfWork */ 
    protected $unitOfWork; 

    /** @var Repository */ 
    protected $repo; 

    public function __construct(\SimpleApi\Infrastructure\Orm\User $dataMapper, IUnitOfWork $unitOfWork) 
    { 
        $this->unitOfWork = $unitOfWork;

        $this->repo = new Repository(
            \SimpleApi\User::class,
            $dataMapper,
            $this->unitOfWork
        );
    }

    /**
     * Creates a entity
     *
     * @return Response The response
     */
    public function create() : Response
    {
        $json = $this->request->getJsonBody();

        $user = new \SimpleApi\User();

        $user
            ->setEmail($json['email'])
            ->setFirstname($json['firstname'])
            ->setLastname($json['lastname'])
            ->setCountry($json['country']);

        if (isset($json['age'])) {
            $user->setAge($json['age']);
        }

        $this->repo->add($user);
        $this->unitOfWork->commit();

        return new JsonResponse($user);
    }

    /**
     * Deletes an entity
     *
     * @param mixed $id The Id of the entity
     * @return Response The response
     */
    public function delete($id) : Response
    {
        $user = $this->repo->getById($id);
        $this->repo->delete($user);
        $this->unitOfWork->commit();

        return new JsonResponse($user, 204);
    }

    /**
     * Shows an entity
     *
     * @param mixed $id The Id of the entity
     * @return Response The response
     * @throws HttpException
     */
    public function show($id) : Response
    {
        try {
            $user = $this->repo->getById($id);
        } catch (OrmException $e) {
            throw new HttpException(404);
        }

        return new JsonResponse($user);
    }

    /**
     * Shows all the entities
     *
     * @return Response The response
     */
    public function showAll() : Response
    {
        $user = $this->repo->getAll();

        return new JsonResponse($user);
    }

    /**
     * Updates an entity
     *
     * @param mixed $id The Id of the entity
     * @return Response The response
     */
    public function update($id) : Response
    {
        $json = $this->request->getJsonBody();

        /** @var \SimpleApi\User $user */
        $user = $this->repo->getById($id);

        if (isset($json['email'])) {
            $user->setEmail($json['email']);
        }
        if (isset($json['firstname'])) {
            $user->setFirstname($json['firstname']);
        }
        if (isset($json['lastname'])) {
            $user->setLastname($json['lastname']);
        }
        if (isset($json['country'])) {
            $user->setCountry($json['country']);
        }
        if (isset($json['age'])) {
            $user->setAge($json['age']);
        }

        $this->unitOfWork->commit();

        return new JsonResponse($user);
    }
}

Open config/http/routes.php and configure CRUD routes to use the controller class.

$router->group(['controllerNamespace' => 'SimpleApi\Application\Http\Controllers'], function (Router $router) {
    $router->group(['path' => '/user'], function (Router $router) {
        $router->get('', 'User@showAll');
        $router->post('', 'User@create');
    });
    $router->group(['path' => '/user/:id'], function (Router $router) {
        $router->get('', 'User@show');
        $router->put('', 'User@update');
        $router->delete('', 'User@delete');
    });
});

Barring any typos you should now have a simple API. To run Opulence locally, use the following command:

php apex app:runlocally

Use a REST client to POST the following JSON to the API:


POST: http://localhost/user


{
    "email": "foo@dev.null",
    "firstname": "Joe",
    "lastname": "Smith",
    "age": 999,
    "country": "JP"
}

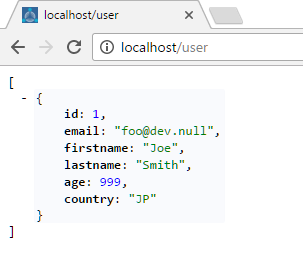
Then try:


GET: http://localhost/user
GET: http://localhost/user/1
PUT: http://localhost/user/1
DELETE: http://localhost/user/1 


Got ideas on how to improve validation, error handling, security, or any other Opulence PHP tips? Post in the comments below.